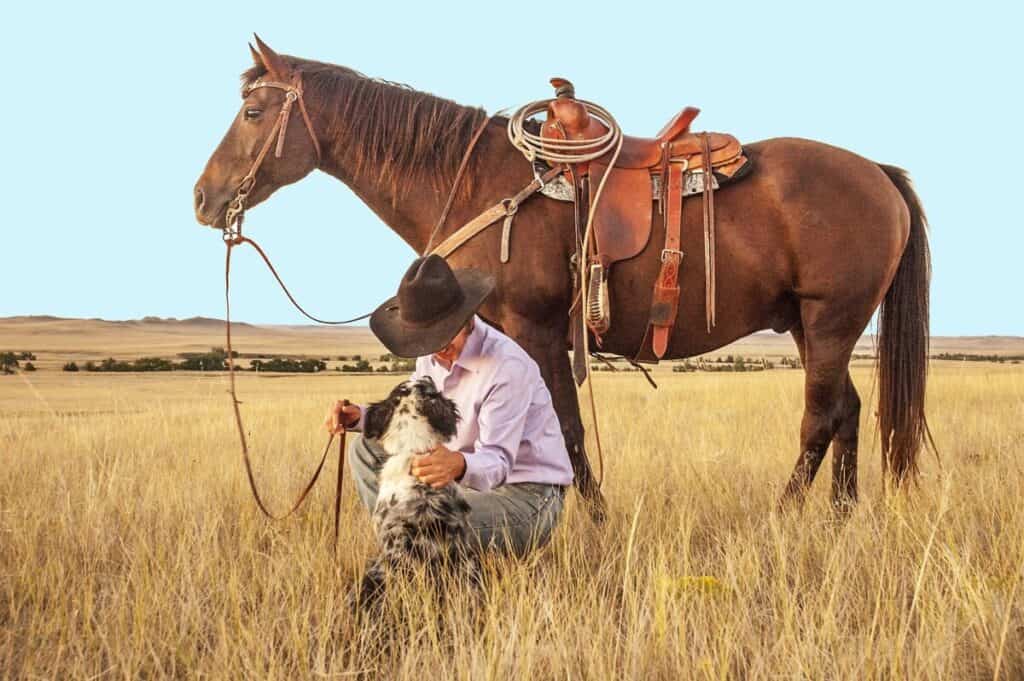
Whether you are world renowned reining trainer, Clinton Anderson tacking up your high money winner for the hundredth time or just dipping your toes into the world of western disinclined riding, understanding the basics of western equipment and tacking up is essential.

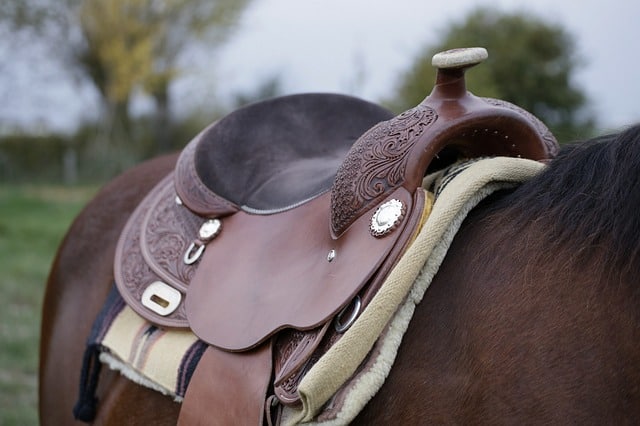
As western riding has become more popular throughout Ireland, as seen by the Irish Quarter Horse Association, the discipline continues to attract newcomers. While this news is exciting to the Irish equine community, the western saddle is very different from traditional uses of the English saddle. Western tack typically has a heftier build than English saddles due to the work that they are designed to do. The western saddle has always been associated with laborious ranch work, usually involving the handling of cattle and livestock, which require additional components to relieve points of pressure to ensure the safety of both horse and rider. WESTERN SADDLE PARTS (differencing from English Saddles)

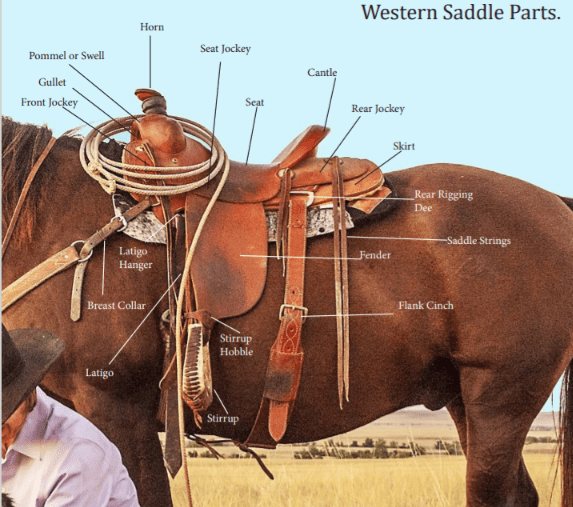
Western Saddle Parts
- Horn; The horn was traditionally designed to handle the pressure of lassos when working with cattle but can also be used as extra support for the rider.
- Pommel/Swell; Located underneath the horn of the saddle, the pommel, or otherwise known as the swell is where the bars of the saddle meet.
- Gullet: The gullet is located underneath the pommel/swell to help minimize and eliminate pressure on the horse’s withers.
- Skirt; Extending from the front to the back of the saddle, the skirt helps with weight distribution and is where the rigging is located for all cinches and breast collars.
- Rigging; On a western saddle the rigging includes the front cinch, back cinch, dee rings, billets and cinch straps.
- Back Cinch; While not on every western saddle, back cinches are used for extra support and weight distribution for high-mobility events such as roping, cutting and reining. Events such as roping and cattle work place a lot of pressure towards the front of the saddle, which can cause strain on the horse’s withers. The back cinch helps to prevent the saddle from lifting too far forward, which helps to distribute the weight more evenly. In reining, back cinches are used to provide extra support to keep the saddle in place during maneuvers such as the sliding stop.
Measuring The Western Saddle
While saddle shopping is exciting, be careful not to buy based on looks but rather the fit to your horse. An ill-fitted saddle can cause uncomfortable and injury-prone positioning on the horse, which can be dangerous for both parties. While all western saddles are similar in measurements, each brand is different, so it is important to measure all saddles before use.

All brands and saddle shops should allow for pre-fittings. When measuring a western saddle, be sure to do so without a pad. This will allow the rider to clearly see where the saddle sits on the horse’s back signalling out where the pressure points will be while riding. The main goal is that the bars of the tree evenly sit across the horse’s back, making contact within only the pockets of the spine allowing for even distribution of the rider’s weight. If the bars sit completely flat, there should be no rocking from either side.
Proper Western Saddle Positioning
The front of the saddle should sit just behind the shoulder blade, allowing for a wider range in movement. The skirt of the saddle should have an even distance from the horse’s side throughout to avoid forward or backward movement, which could result in uncomfortable pressure on the withers or loin area. The gullet of the saddle is designed to allow space between the horn and the withers so that the torque focused on the horn does not come in direct contact with the horse’s withers. With this in mind, the gullet should be at least 2 finger-lengths away from the wither at all times. Some prefer a higher gullet for the purposes of fitting a wider variety of horses and torque ability. Once all of these steps are taken and the saddle is fitted correctly, be sure to take a step back to see how the saddle sits. The saddle should be horizontally even from horn to cantle, signifying that it is properly fitted. While pads can be used to combat ill-fitting saddles, it is advised to not rely on them to compensate for pressure release.
How to Tack Up with a Western Saddle
Now that you have the right saddle, it is time to tack up. TACKING UP While there are many methods and personal tactics of tacking up a western saddle, here are the basics to ensure safe and proper positioning.
1. Before even thinking of throwing your saddle up on your humble steed, it is important to groom and brush down the saddle area. This process, although it may seem like busy work, is crucial. Brushing away dirt and cowlicks helps to avoid future saddle sores and wounds.
2. Now that you have cleaned the area, carefully position your saddle pad further forward to begin then slide the pad back so that no fur is sticking up or ruffled in avoidance of saddle sores. The pad should be placed as if the front of the pad is cutting the horse’s shoulder in half.
3. Now on to the fun part; saddling. Before swinging your hefty saddle over your horse’s back, be sure that all your riggings are either hanging over the seat or secured on the right side of the saddle to avoid hitting you the horse. Gently place the saddle over the pad and position it so that the front of the bars sit behind the shoulder blade. Western saddles tend to be quite heavy, so do not be afraid to use a mounting block your first few tries to get used to the feeling. While this process is helpful, be sure that your horse is desensitized to the mounting block first.
4. Once your saddle is positioned correctly, undo your cinches and breast collar so that they are hanging and ready. If your saddle has all three, first complete the front cinch, back cinch then breast collar. This process is reversed when untacking. Carefully reach across the belly of your horse to grab the front cinch to which you will feed the latigo through. The latigo will then be fed through the rigging under the fender and back through the front cinch. Depending on discipline, this process can be repeated several times to ensure security. Secure the cinch by feeding the latigo through the cinch buckle. The excess latigo can then either be fed through the tongue if provided or cowboy knotted around the skirt rigging. The front cinch should be just tight enough so that the saddle is secured, but it is not necessary to tighten it all the way until your ride.
5. If your saddle has a back cinch, use caution while reaching under your horse to secure it on the other side using the provided billet. The back cinch should just be tight enough to fit a fist positioned sideways between the horse and the cinch.
6. The breast collar is used for additional support of the saddle in events that require rapid movements such as team roping or cutting. Carefully grab the breast collar and pull across the chest of the horse and latch to the provided dee ring and buckle the breast collar so that you can easily slide your hand between the horse and the breast collar. Cautiously latch the bottom strap to the D-ring on the front cinch which will keep the breast collar in place.
7. Once your horse is saddled, it is now time to bridle before making your way out to the arena. Make sure your horse is untied for this part, ensuring that no ropes get caught if your steed decides to pull back. Place the reins over your horse’s head, which will act as your source of control while your horse is untied. While some riders prefer to buckle or tie their halter around the horse’s neck for extra control, it is advised to only use the reins. This allows for less materials in the area that could potentially get caught up or bound in case of an emergency. This method also provides a more efficient and easier bridling process. Using one hand, gently slide the headstall up and over the horse’s head while aiding the bit into the mouth with your other hand. For safer practices, latch the ear farthest from you first. Try to make bridle adjustments and measurements before bridling. Once the bridle is secure, adjust the cheek strap so that you can fit at least 2 fingers between the bridle and your horse.

Now that you are properly saddled and bridled, you are finally ready to enjoy the leisure and luxury that is a western saddle, just be sure to double check all equipment and tighten cinches before mounting.
This Article was written by Jordan Bastian and was originally published in the August 2020 Issue of Irish Sport Horse Magazine.
